|
|
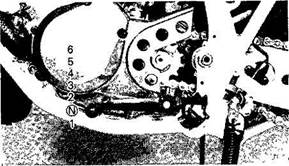
Do not run the motorcycle until you know it has sufficient engine oil.
B-302 Oil warning light checking method Main switch "ON"
Oil warning indicator light does not come on Oil warnmg indicator light comes on
Oil warning indicator light does not come on
Oil warning indicator light comes on
Supply engine oil
"Coolant temp." warning indicator light (red): (For Oceania) This indicator light comes on when the coolant heats up extremely (about 110°C}. So stop the engine immediately and wait until it will cool down sufficiently. This light can be checked by the following procedure. 3-4 "Coolant temp." warning indicator light checking method (For Oceania)
Warning indicator I light comes on Wait a few seconds.
Warning indicator light goes off.
Electrical circuit is OK. Go ahead with riding.
NOTE: _____________________________ If the main switch is turned off after the warning light goes out and then immediately again the main switch is turned on, the warning light may not come on. This is not because of failure. B-400 Speedometer
The odometer and trip odometer are built into the speedometer. The trip odometer can be reset to "0" with the reset switch. Use the odometer to estimate how far you can ride on a tank of fuel before going to "RESERVE". This information will enable you to plan fuel stops in the future. B403 Tachometer (Except for Oceania)
This model is equipped with a tachometer so the rider can monitor the engine speed and keep it within the ideal power range.
2 Red zone U-304 Do not operate in the red zone Red zone: 9,500 r/min and above
Engine temperature gauge {Except for Oceania)
This gauge indicates the coolant temperature when the main switch is ON. The engine operating temperature will vary with changes in weather and engine load. If the needle points to the red zone or higher, stop your motorcycle and let the engine cool. (See page 6-11 for details.) When the engine is overheated, do not continue riding.
Handlebar switches:
1 "LIGHTS" (Dimmer) 2 "TURN" switch 3-7 B 601 "LIGHTS" (Dimmer) switch Turn the switch to "HI" for the high beam and to "LO" for the low beam. B-605 "TURN" signal switch This is a three-way switch. The center position is off; turn to the "L" to turn on the left flasher and to the "R" for the right flasher. Be sure to turn the switch off after completing a turn. 8 602 "HORN" switch Press the switch to sound the horn. B-612 "LIGHTS" switch Turn the light switch to "ON" to turn on the headlight, tarllight, and meter lights. Turn the light switch to "PO" to turn on the auxiliary light, taillight, and meter lights. B-609 "ENGINE STOP" switch The engine stop switch is a safety device for use in an emergency such as when the motorcycle overturns or when trouble occurs in the throttle system. The engine will not run when the engine stop switch is turned to "OFF." In case of emergency, turn the switch to "OFF." Clutch lever The clutch lever is located on the left handlebar; it disengages or engages the clutch. Pull the clutch lever to the handlebar to disengage the clutch, and release the lever to engage the clutch. The lever should be pulled rapidly and released slowly for smooth starts. 3-8 B-aoo Change pedal
The gear ratios of the constant-mesh 6-speed transmission are ideally spaced. The gears can be shifted by using the change pedal on the left side of the engine. B-900 Front brake lever The front brake lever is iocated on the right handlebar. Pull it toward the handlebar to activate the front brake. B-901 Rear brake pedal The rear brake pedal is on the right side of the motorcycle. Press down on the brake pedal to activate the rear brake. C-003 Fuel tank cap 1. To remove the tank cap, insert the key in the lock and turn the key 1 /4 turn counterclockwise. Rotate the cap 1/4 turn counterclockwise and remove it from the tank. 3-9
1 Fuel tank cap U-013 NOTE: 2 Open 2. To reinstall the tank cap, set the cap in the filler neck and rotate the cap 1 /4 turn clockwise. Lock the cap by turning the key 1/4 turn clockwise, and remove the key. U-611 .WARNING:   ЧТО И КАК ПИСАЛИ О МОДЕ В ЖУРНАЛАХ НАЧАЛА XX ВЕКА Первый номер журнала «Аполлон» за 1909 г. начинался, по сути, с программного заявления редакции журнала...  Конфликты в семейной жизни. Как это изменить? Редкий брак и взаимоотношения существуют без конфликтов и напряженности. Через это проходят все...  Система охраняемых территорий в США Изучение особо охраняемых природных территорий(ООПТ) США представляет особый интерес по многим причинам...  Что делать, если нет взаимности? А теперь спустимся с небес на землю. Приземлились? Продолжаем разговор... Не нашли то, что искали? Воспользуйтесь поиском гугл на сайте:
|
 3-2
3-2
 Gears in "NEUTRAL'


 _£
_£

 Shrft into gear


 Ask a Yamaha dealer to inspect electrical circuit.
 Engine od level and electrical circuit are OK. Go ahead with riding.
 I
I
 3-3
3-3 Main switch "ON"


 Warning indicator light does not come on.


 Warning indicator light does not go off.


 Ask a Yamaha dealer to inspect electrical circuit.
 3-5
3-5

 3-6
3-6
 B600
B600